The Story Behind the Recipe 🍰
You know how some desserts make you stop everything just to take a deep breath before the first bite? That’s exactly what Loaded Brownie Cheesecake Cups do.
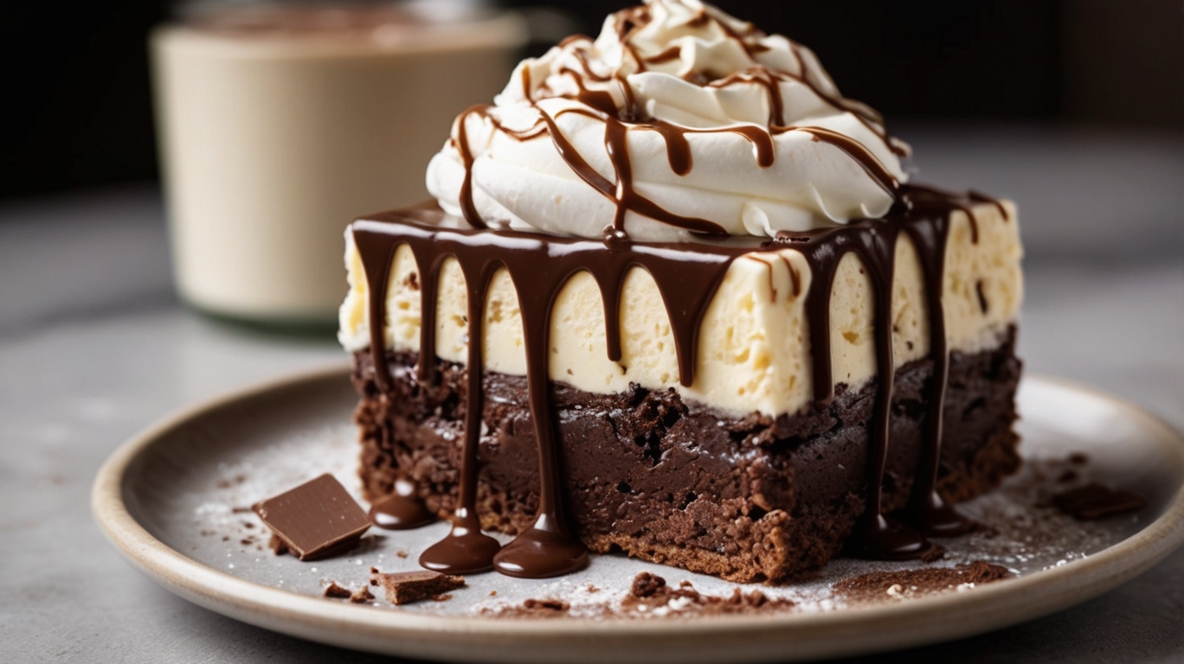
This recipe was born on a cozy Saturday night when my sweet tooth wouldn’t quit (we’ve all been there 😅). I wanted brownies… but I also wanted cheesecake. And maybe a little something extra — you know, chocolate chips, caramel drizzle, crushed cookies — the works.
So, I started experimenting. I baked a batch of brownies, scooped some cheesecake batter on top, and added all the toppings I could find in my pantry. When they came out of the oven, I knew I’d struck gold. The smell was heavenly — fudgy chocolate, creamy vanilla, and toasted nuts — like a bakery and candy shop rolled into one.
I shared a few with my family (after taste-testing, of course), and everyone went crazy for them. My husband said they tasted like “brownie sundaes in cupcake form,” and the kids called them “party cups.” Ever since, these little beauties have been our go-to dessert for birthdays, holidays, and those nights when we just want to spoil ourselves a little.
If happiness had a flavor, this would be it. ❤️
What Makes This Recipe Special
These Loaded Brownie Cheesecake Cups are everything you love in one bite — rich, creamy, sweet, and indulgent. Here’s why they’re so special:
- Two Desserts in One: Brownies + Cheesecake = dessert perfection!
- Individual Servings: Perfectly portioned for parties, holidays, or gifting.
- Customizable: Add any toppings you like — caramel, nuts, candy, or even fruit.
- No-Fuss Prep: Easy ingredients, minimal mess, maximum flavor.
- Make-Ahead Friendly: They taste even better chilled overnight.
They’re beautiful enough for guests but comforting enough for a midnight treat in pajamas.
Ingredients – Fresh, Simple & Full of Flavor
You probably have most of these in your kitchen already! 💕
🍫 For the Brownie Layer:
- 1 box of brownie mix (or your favorite homemade brownie recipe)
- Ingredients listed on the box (usually eggs, oil, and water)
🍰 For the Cheesecake Layer:
- 8 oz (1 block) cream cheese, softened
- ¼ cup granulated sugar
- 1 large egg
- 1 teaspoon vanilla extract
🍬 For the Loaded Toppings (choose your favorites!):
- ¼ cup mini chocolate chips
- ¼ cup chopped pecans or walnuts
- 2 tablespoons caramel sauce
- 2 tablespoons hot fudge sauce
- Crushed Oreos or toffee bits (optional)
- Whipped cream, for garnish
Step-by-Step Cooking Instructions
Step 1: Preheat and Prepare
Preheat your oven to 350°F (175°C). Line a muffin tin with paper cupcake liners. Lightly spray each liner with non-stick baking spray for easy removal later.
Step 2: Make the Brownie Base
Prepare your brownie batter according to package instructions. Scoop about 1½ tablespoons of brownie batter into each cupcake liner — about one-third full.
Step 3: Prepare the Cheesecake Mixture
In a mixing bowl, beat cream cheese and sugar together until smooth and creamy. Add egg and vanilla extract, mixing until just combined.
Step 4: Assemble the Layers
Spoon about 1 tablespoon of cheesecake mixture over each brownie base. Use a toothpick or knife to gently swirl the two layers together for a marbled effect — or leave them layered for a cleaner look.
Step 5: Add the Toppings
Sprinkle each cup with mini chocolate chips, chopped nuts, or crushed cookies. You can even drizzle caramel or fudge sauce on top before baking for extra richness.
Step 6: Bake
Bake for 20–22 minutes, or until the edges are set and the centers are slightly jiggly (they’ll firm up as they cool).
Step 7: Cool Completely
Allow the cups to cool in the pan for 10 minutes, then transfer them to a wire rack. Chill in the fridge for at least 1 hour before serving for the perfect cheesecake texture.
Serving Suggestions – What to Pair It With
These Loaded Brownie Cheesecake Cups are incredibly indulgent, but there’s always room to elevate dessert!
Here’s how to serve them like a pro:
- 🍦 With Ice Cream: Add a scoop of vanilla or salted caramel ice cream.
- ☕ With Coffee or Espresso: The perfect rich pairing.
- 🍓 With Fresh Berries: Strawberries or raspberries balance the sweetness.
- 🥛 With Cold Milk: Classic comfort combo.
- 🍾 For Parties: Serve them on a tiered dessert tray with drizzle toppings on the side for guests to customize.
They also make adorable edible gifts — just wrap them in cupcake liners and pop them into a pretty dessert box!
Customization & Variations
The best part of these cups is how easy they are to personalize! Here are some fun twists:
- Peanut Butter Lovers: Swirl peanut butter into the brownie layer before baking.
- Cookies & Cream: Add crushed Oreos to the cheesecake batter.
- Salted Caramel Dream: Drizzle caramel on top and sprinkle with sea salt flakes.
- Mint Chocolate: Add a few drops of peppermint extract to the cheesecake mixture and top with crushed mint candies.
- Berry Bliss: Add fresh raspberries or strawberries before baking for a fruity surprise.
- Mocha Magic: Mix a teaspoon of espresso powder into the brownie batter for a coffee kick.
Each variation turns these little cups into a whole new dessert experience!
Storing & Reheating
- Refrigerate: Store in an airtight container for up to 5 days.
- Freeze: Wrap each cup tightly and freeze for up to 2 months. Thaw overnight in the fridge.
- Serve Cold: These taste best chilled — creamy, fudgy, and firm.
- Warm Option: Microwave for 10–15 seconds for a gooey, melty treat.
Pro Tip: Don’t stack them directly — use parchment paper between layers to keep toppings intact.
Nutritional Snapshot (Per Serving – Approx.)
- Calories: 340
- Fat: 20g
- Carbohydrates: 36g
- Protein: 5g
- Sugar: 28g
- Fiber: 2g
Decadent? Yes. Worth every bite? Absolutely. ❤️
Reader Q&A – Common Questions
1. Can I use homemade brownie batter?
Definitely! Use your favorite recipe for extra richness.
2. Do I need to use cupcake liners?
Yes — they make removal much easier and keep the cups pretty for serving.
3. Can I skip the cheesecake layer?
You can, but then you’ll just have brownies (delicious, but not “loaded”!).
4. Can I make them gluten-free?
Yes, just use a gluten-free brownie mix.
5. Can I make these in advance?
Absolutely — they taste even better after a night in the fridge.
6. How do I make them extra creamy?
Make sure your cream cheese is softened and don’t overbake!
7. What toppings work best?
Caramel drizzle, chocolate chips, chopped nuts, or crushed cookies — all amazing.
8. Can I make mini versions?
Yes! Use a mini muffin tin and bake for 12–14 minutes.
9. How do I keep them from sinking in the middle?
Avoid overmixing and don’t open the oven too early.
10. Can I serve these warm?
Yes — just know the cheesecake layer will be softer and gooier (yum!).
Final Thoughts 🍽️
These Loaded Brownie Cheesecake Cups are more than just dessert — they’re an experience.
Every bite is a little symphony of flavors: the dense, fudgy brownie base, the smooth, creamy cheesecake, the crunch of nuts, and the drizzle of caramel or chocolate on top. It’s indulgent, comforting, and guaranteed to put smiles on every face.
Whether you’re baking for family night, a potluck, or just a “treat yourself” moment (we all need those ❤️), this recipe delivers bakery-quality results with simple, everyday ingredients.
Make them once, and they’ll earn a permanent spot in your dessert rotation — promise.
Tried This Recipe? 💕
If you made these Loaded Brownie Cheesecake Cups, I’d LOVE to see how yours turned out!
📸 Share your creations on Pinterest (@Granny’s Lil Kitchen) and tag me — I might feature your bake on my next post!
Did you go caramel-crazy? Add Oreos or a peanut butter twist? Tell me in the comments below — your ideas always inspire me (and make my sweet tooth dance 💃).
Until next time, keep baking with love, licking the spoon, and treating yourself to something sweet. 💖

Hi, I’m Sayan, the creator behind grannyslilkitchen.com. I’m passionate about making home cooking easy and enjoyable for everyone. Whether you’re a beginner or an experienced chef, my goal is to help you create delicious meals with simple ingredients.